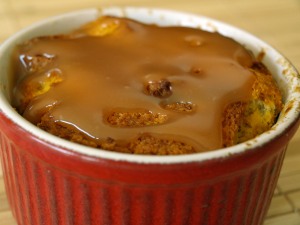
I love Halloween.  I love how Halloween is the kick-off to a three month long holiday season.  I love the crafty projects that start coming up on blogs.  The candy.  The food.  I fall victim to many new projects and recipes each year.  Some recipes become mainstays in our house.  This pumpkin fudge recipe is one of those recipes and something I will be posting in the next few days. I have a feeling this much-blogged-about Halloween bark recipe will become another go-to Halloween recipe and something I’m planning on making this weekend.

Craft projects are usually related to Halloween costumes, my step-daughter’s to be more exact.  Last year we took a cue from Food Network Magazine’s food themed costumes and turned her into a McDonald’s french fry box.  This costume was fun to make and looked great at her Halloween parade at school.

Halloween 2009

It was not, however, functional for trick-or-treating, and my husband ended up carrying it behind her while she went from house to house trying to keep up with the other kids.  Tears were involved and drama ensued.  So this year we were looking for something a bit more practical, but still cute.  I came across this easy owl costume while blog hopping and knew this was just what we needed.  A long sleeved black t-shirt and leggings?  Count us in.

Halloween 2010

The tutorial came with a printable mask that you could attach to sunglasses.  I decided to make my own mask out of fabric and rigid interfacing.  The result is super cute, and highly more functional than paper.  It will at least hold up in the rain!  The feathers are cut out of fabric and sewed or glued onto the t-shirt.  We had a fun time picking out fabric and Jessica helped cut out the feathers.  She had a lot of fun helping with her costume and cannot wait to wear it to the parade tomorrow and trick-or-treating on Sunday.

Halloween 2010

Sorry for such a long absence!  Summers around here are usually pretty busy and three days of the week are spent at our cabin with no internet access.  I do plenty of cooking and baking, but very little documenting.  We had a great summer.  Beautiful weather, a lot of late days on the lake, and late nights on the deck.  We can’t wait for next summer to do it all again, but for now are enjoying what has so far been a very gorgeous, yet very busy fall.

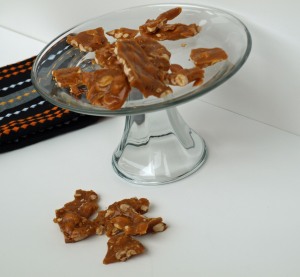
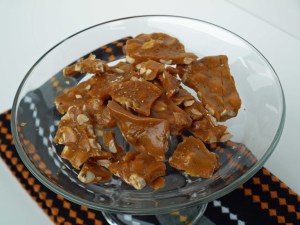
For this week’s Sweet Melissa selection JoVonn of the Givens Chronicles chose Sweet Melissa’s Peanut Brittle.  I love peanut brittle and have never made it before.  I actually kind of like making candy, though it does terrify me a little bit.  I just have this thing against getting burned, even little minor finger tip burns freak me out.  I successfully managed to make this brittle without incident, and found the recipe to be quite easy.

I was in the mood for some fall flavors, so I added 1 tsp of pumpkin pie spice and replaced 2 TBS of the butter with 2 TBS of canned pumpkin puree.  I think the pumpkin made the brittle a bit chewier than normal and the pumpkin pie spice gave it a nice kick.


I love the orange color of this brittle.

Great selection, JoVonn!  Please visit her blog for the recipe and check out what the other Sweet Melissa bakers made this week!


When it came time to choose my selection for the Sweet Melissa Sundays Baking Group, the decision was easy – Sour Cherry and Almond Biscotti.  Cherries and Almonds are such a great flavor combination, and a favorite of mine.  Also, almonds are the only nuts I could sneak into baked goods and still get a positive response from my husband!

Biscotti can seem intimidating, but are really quite easy to make.  It’s the whole “twice baked” nature of them that people shy away from, but what’s so hard about baking something twice?!?  The oven does all the work, right?  I somehow managed to have everything on hand to make these, so it didn’t even require a trip to the store for me!  Even easier!  I did have to do so some substituting, so my pantry isn’t as well stocked as it seems…The recipe calls for 1/4 cup of fresh orange juice to reconstitute the dried cherries, but I only had a lemon.  Also, since it required the zest of one lemon as well, I saw no reason to juice one citrus fruit and zest the other.  I imagine if the cherries were soaked in orange juice it would lead to a sweeter cherry flavor, but I liked them tart.
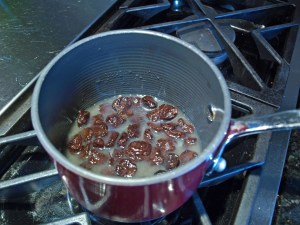
The dough comes together relatively quickly, but I don’t think there is enough flour in it.  It was really sticky, and remained sticky after chilling for well over an hour, so I dumped another 1/4 cup on top and worked it in.  It worked out perfectly.
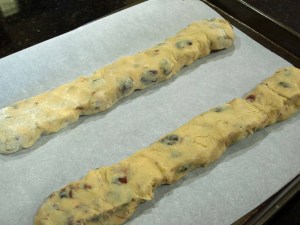
After baking the logs for 30 minutes you need to score the logs into 3/4-inch pieces at a 45 degree angle then cut straight through the score.
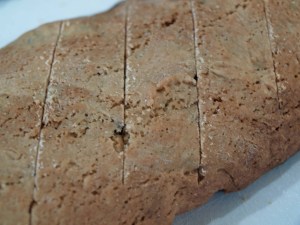
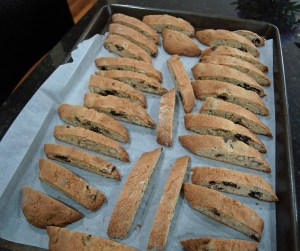
For the second baking you lower the oven to 275 degrees and bake the cut pieces for 60 minutes.  This is what gives them that super crispy texture that even storing in an air tight container doesn’t make soggy.  I brought the biscotti up to our cabin for the 4th of July and they were devoured by our friends over the weekend.

Melissa puts this recipe in her “After-School Snack” section but I think these are perfect with coffee.    I’ll definitely be making these again, and perhaps will play around with different flavor combination like fig and walnut with orange zest, cherries and pistachios, or even get crazy and add chocolate chips!  White chocolate chips and cranberries would be delicious, don’t you think?
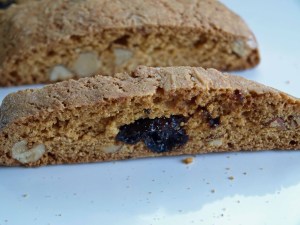
Sour Cherry and Almond Biscotti

pages 72-73 of The Sweet Melissa Baking Book

  • 1/2 cup dried sour cherries
  • 1/2 cup fresh orange juice
  • 4 Tablespoons (1/2 stick) unsalted butter, at room temperature
  • 1 cup sugar
  • Zest of 1 lemon
  • 1/4 teaspoon salt
  • 2 large eggs
  • 1 1/2 teaspoons pure vanilla extract
  • 1 1/2 tsp almond extract
  • 1 3/4 cups all-purpose flour
  • 1 teaspoon baking powder
  • 1/2 cup whole blanched almonds, roughly chopped

BEFORE YOU START

Line a cookie sheet with parchment paper or aluaminum foil

  1. In a small saucepan over low heat, combine the cherries and orange juice and bring to a simmer.  Remove from teh heat, cover, and let the cherries reconstitute.
  2. In the bowl of an electric mixer fitted with the paddle attachment, cream the butter, sugar, zest, and salt until light and fluffy, 3 to 4 minutes.  Add the eggs, one at a time, mixing well after each addition.  Scrape down the sides of the bowl.  Add the vanilla and almond extract.
  3. In a separate bowl, whisk together the flour and baking powder.
  4. Add the flour mixture to the butter mixture in three batches, mixing well after each addition.  Scrape down the sides of the bowl.
  5. Drain the cherries, discarding the juice.  Stir the cherries and almonds into the dough.
  6. Turn the dough out onto the prepared cookie sheet, flatten, and refrigerate until firm, about 1 hour.
  7. On a lightly floured work surface, divide the dough in half.  Using a little extra flour if the dough is sticky, roll each half into a log about 14 inches long.
  8. Position a rack in the center of your oven.  Preheat the oven to 350 degrees.  Line the cookie sheet with clean parchment paper.
  9. Place the logs about 4 inches apart on the prepared cookie sheet.  Bake for 30 minutes, or until the logs are lightly golden and slightly firm.  Remove to a wire rack to cool.  Turn down the oven to 275 degrees.
  10. As soon as the logs are cool enough to handle but still warm, about 10 minutes, carefully peel them off the paper and transfer to a cutting board.  Using a serrated bread knife, gently score the logs at 3/4-inch intervals on a 45-degree angle.  After scoring, cut through each scored line in one motion with a sharp chef’s knife, slicing the logs into pieces.
  11. Carefully transfer the cookies to a freshly lined cookie sheet browned side down and not touching one another.  Bake for an additional 60 minutes, rotating the cookie sheet after 30 minutes.  Remove to a wire rack to cool on the pan to room temperature.

The biscotti will keep in an airtight container at room temperature for at least 1 week (assuming they last that long).  For longer storage, tightly wrap in plastic wrap and then aluminum foil and freeze for up to 3 weeks.  Do not unwrap before defrosting.

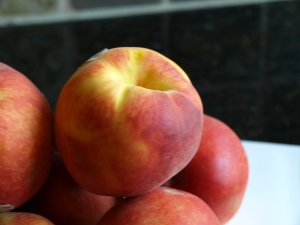
fresh peaches

Submitting late this week since we spent the long weekend at our cabin in Wisconsin.  Lots of boating, drinking, cooking and eating.  It was a great weekend!

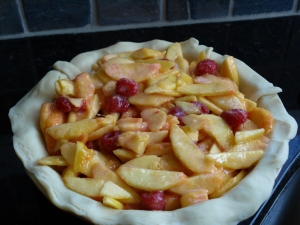
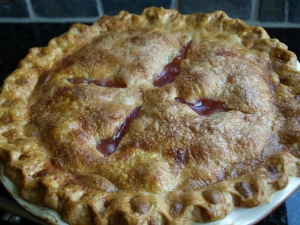
Rebecca of Beurrista chose this very summery pie this week – perfect for July 4th!  This pie was delicious.  In an effort to save time I need to admit that I used Pillsbury pie crust.  Why mess with perfection?  Their crust always works out.  Plus, being a Minnesota girl I feel the need to support Betty Crocker…buy local! 😉 (I realize the pie crust is likely made in some plant in Louisville, KY or somewhere not at all close to Minnesota – let me make my own justifications)

The filling came together in a jiff, and called for a very unlikely ingredient, ground tapioca pearls.  I substituted tapioca flour since I do not have a coffee grinder dedicated to just spices and really didn’t want coffee flavored fruit pie.  I really thought this would be the secret ingredient to prevent a juicy fruit pie.  Not totally, but it certainly wasn’t the same mess as my last attempt at fruit pies.

filling

The pie bakes for a really long time, 1 hour and 45 minutes.  I was nervous about it browning too quickly, so I checked mine after an hour.  It was rather dark so I added foil to the crusts just to be safe.  I also can’t leave well enough alone and took it out after 1 hour and 30 minutes.  The juices were bubbling and it looked like it might set up.  It was a bit messy when we cut into it, but not terrible.  Next time I will leave it for the whole cooking time.

freshly baked

We cut into this pie well after dark, so I didn’t get any pictures of it sliced open.  I can tell you that we thoroughly enjoyed this pie.  My friend deemed it her favorite dessert ever and thought about the pie all weekend long.  Surprisingly, there is one slice left…I think I might finish it off!

Thanks Rebecca for this amazing and well timed selection.  Check out her blog for the recipe or buy the Sweet Melissa Baking Book.  Also, check out the SMS bakers list to see other examples of this pie.

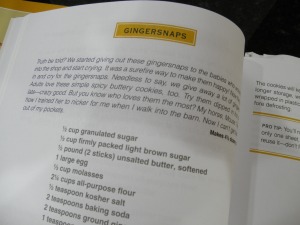
This week’s Sweet Melissa Sunday selection was chosen by Gloria of The Ginger Snap Girl.  She appropriately chose gingersnaps!  The timing of this recipe could not have been better.  My brother was in town and is a huge fan of gingersnaps.

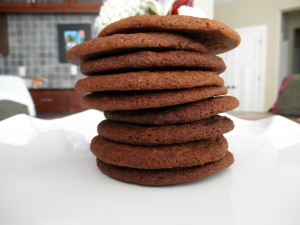
These cookies had great flavor.  They were chewy, which disappointed me since I like the crunch of gingersnaps that come in a box, or a bag.  Those are so crunchy they hurt my mouth (in a good way) but I think that’s hard to replicate with fresh baking.  My brother, the true ginger snap connoisseur, loved them!  He probably ate 2/3 of the batch on his own!

This is all that was left of the cookies!

These cookies bake up flat and I think would really benefit from some icing.  Or sandwich some fluffy frosting between two of them!   These would be a perfect addition to a Christmas cookie exchange.

Please visit this post for the recipe.  Thanks Gloria for your very timely selection!

Visit the Sweet Melissa Sundays bakers list to see what everyone else did with this recipe.

This past weekend my step-daughter had a slumber party at our house to celebrate her 10th birthday.  Being the type of people who like to cook, ordering pizza was not for us, though it certainly would have made for a much easier party!  We have a pizza stone that goes straight on the grill and creates that nice, crisp crust you’d find from a wood burning oven.  My husband and I really have the pizza making process down to a science – and it’s a crowd favorite summer after summer.

grilled pizza

We had the girls each make their own pizza.  My pizza dough recipe (made in the bread machine – so easy!) makes enough for 4 medium to large sized pizzas, so for the personal size I divided the dough into smaller (5 oz) portions.  We spread out corn meal on our counter, set the rolled out dough on the corn meal and let them have at it!

pepperoni pizza

The girls had a blast – and it really went with our (unintentional) DIY theme.  We had them decoorate their own picture frames (and took a super cute picture of them with chocolate mustaches to put in the frames!), and my daughter and I made them each a pillowcase – more to come on both of these items.

My go-to pizza dough recipe is from The Bread Lover’s Bread Machine Cookbook – an excellent book if you like to use your bread machine.

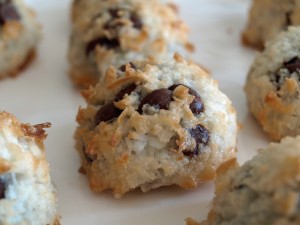
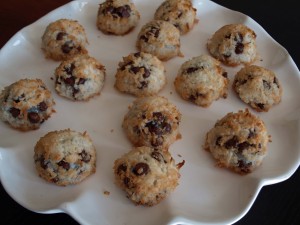
Coconut Chocolate Macaroons

This week’s Sweet Melissa Sunday recipe was chosen by Ellen of Blue Tree Green Heart.  This recipe could not have been simpler and was exactly what I needed!  I love macaroons and was eyeing up the Two-Bite Macaroons from Whole Foods the other day when I realized this week’s recipe was macaroons!  Craving solved.

I’m not kidding when I say this dough came together in maybe 5 minutes.  The hardest part was separating the eggs.  And how hard is that?!?  The recipe suggests you finely chop good-quality semi-sweet chocolate, which I imagine would result in a chocolate flavored macaroon versus one with bites of chocolate in it.  I decided to go with good-quality semi-sweet chocolate chips anyway to save time.  The recipe also states that you can keep the dough in the refrigerator for up to 1 week.  How easy is that?  So, I made 1/2 a batch and will back of the rest in a few days.

ready for baking

I did omit the orange zest since I do not like orange and chocolate together.  Why ruin perfectly good chocolate with fruit?  Makes no sense to me.

ready for the taking

The next time I make these, and judging from the many requests from my husband and the other two in our office it will be soon, I will omit the chocolate and maybe dip half of them into melted chocolate.  They’d be like an Almond Joy then.  Well, a Mounds anyway.  Sometimes you feel like a nut…

A quick google search told me that the coconut I used is gluten free, which means my nephew can have a few of these!  This recipe just keeps getting better and better…

To view the recipe check out Ellen’s blog, and visit the other SMS bakers to see more variations.  Thanks Ellen!  This recipe is definitely a keeper in our house.

Wow.  This week’s recipe was a disaster for me!  First, I was unable to find unsalted pistachios.  I was running out of time and couldn’t visit more grocery stores (or make it to Whole Foods where I suspect they had the unsalted nuts in bulk…) so I went with the variation on the recipe and purchased unsalted hazelnuts.  Then the SEEDLESS raspberry jam became hard to find, but eventually I managed to find a jar.  The seeds would have bugged me, so I was hell-bent on finding seedless.  The dough came together quickly in the food processor, which I LOVE.  I chilled it for the recommended hour while I made  different cookie dough to bring to an after school event at my daughter’s school (more on this later).  Since I’m not really a hazelnut fan, I decided not to crush more hazelnuts and roll the cookies in them, but I do like a meringue-y texture to cookies (reminiscent of these Swiss Meringue Horns I make my mom make for Christmas each year – delish) so I did roll the balls into egg whites.  I’m not sure if this is where I went wrong or not….

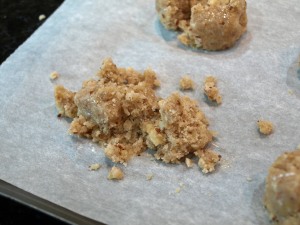
Disaster

This happened to EVERY cookie ball.  I thought maybe I could salvage a few, but nope.  I tried letting them warm up a bit and they were still a crumbling mess.  I decided life is too short for frustrating cookies and dumped the whole thing in the trash.  It was a very disappointing recipe, to say the least.

To see some successes – check out the other SMS bakers. And if, even after this rousing endorsement you feel compelled to make these cookies, visit Tracey’s blog (not me) for the recipe. Visit her blog anyway, she’s always up to some deliciousness.

This past week was CRAZY – no time for SMS.  We had a graduation, a work happy hour, a graduation party, a long drive to Wisconsin, a wedding and a long drive back from Wisconsin.  Whew.  I’m exhausted.   I will make the pralines this week since I have all the ingredients.  I’ll share them with our friends coming up to our cabin this weekend and then share the results with all of you!

Go check out Tess’ blog – The Cookin’ Chemist – for the recipe and a brief history on pralines.  Hers look really good – like so good I could almost taste the butterscotch-y, sugary-y goodness.  I’m looking forward to making these!  Also, check out the other fabulous SMS bakers – you will be sure to get inspired! These ladies are up to some great things any day of the week.

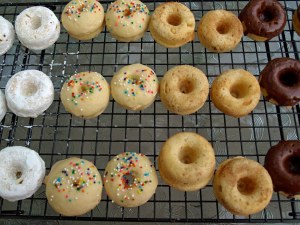
I did finally try out my new baked mini-donuts pan. Fabulous. These little guys are so frickin’ cute I can hardly stand it.

Mini-donuts

I tried a recipe I found off tastespotting and it was just OK, so I’m not going to link to it.  I think next time I’m going to make the recipe that came off the back of the pan’s packaging.  There is more fat in that recipe which will likely make a tastier donut.  Fat = Yummy.  I made 4 different varieties – powdered sugar, cinnamon and sugar, chocolate glaze and a vanilla glaze.

vanilla glazed mini donuts with sprinkles

The vanilla glaze was by far my favorite but in no way satisfied my craving for donuts.  I’ll keep playing with the pan and trying out different recipes and will share the best one I find.  Stay tuned…

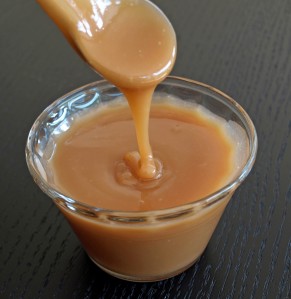
bourbon salted caramel sauce

Wow!  Is it Sunday already?  The days have been flying by!  Ater a week of rain we finally had a beautiful weekend.  Let summer begin!  We spent yesterday on our boat at our cabin.  It was a gorgeous day for bar hopping around the lake, soaking up the sun.  It felt great.  The last thing I wanted to do was go home and bake, so I didn’t!  I waited until the very last minute, as usual.  (My mom is reading this and rolling her eyes, thinking that some things never change).

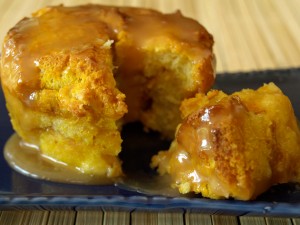
mini bread pudding

This week’s SMS was chosen by Carmen of Baking is My Zen.  Carmen, unlike me, is ahead of the game with this recipe!  She chose it because she wants to get a head start on her holiday baking and try out recipes before the big day (Thanksgiving).  Carmen, you over-acheiver!!  You’re making the rest of us look bad…Well, I for one am glad she chose this recipe because I will make this bread pudding again.  I’ll just wait for a less than perfect day to do it!

Despite the rather long list of to-dos with this recipe it came together quite quickly.  I made the bread pudding in a 2 qt baking dish and 1 little ramekin since our friend is having us over for dinner and I said I’d bring dessert.  Rather than make the recommended rum raisin caramel sauce with this pudding I made a salted caramel bourbon sauce.  I just heated up a 1/2 tsp of fleur de sal with the cream while cooking the sugar and water and added 1 TBS of bourbon at the end.  I had a bite after I was done taking pictures and it is really good.  I might stop and get some vanilla ice cream on my way to my friend’s house, or maybe whip up some cream since I think it will benefit from something cold with it. (Plus, it’s not really rich enough with the 8 eggs and 2 cups of cream…ahem).

Go to Carmen’s blog to get the recipe (and check out her AWESOME photo tutorial – well done!).  You won’t regret it.  And check out what the other SMS bakers did this week.  I’m always inspired by these ladies.

mmmmm....caramel sauce

April 2024
M T W T F S S
1234567
891011121314
15161718192021
22232425262728
2930  

Flickr Photos